Baking without gluten can sometimes feel like navigating a culinary labyrinth, were teh familiar textures and flavors of conventional breads and pastries seem just out of reach. Yet, mastering gluten-free baking is not only possible-it can open up a world of delicious, wholesome creations that delight the palate and nourish the body. Whether you’re new to gluten-free cooking or looking to elevate your skills, this guide will unravel the secrets to achieving moist cakes, chewy cookies, and airy breads without relying on wheat flour.Get ready to transform your kitchen into a gluten-free haven, where every bite is as satisfying as it is safe.
Mastering gluten-free baking requires an intimate understanding of how various flours behave without the familiar structure of gluten. When choosing the perfect gluten-free flours for flavor and texture, it’s all about balancing taste, moisture retention, and binding properties.Imagine biting into a tender, moist slice of cake or a light, fluffy muffin – it’s achievable by carefully selecting your flours and pairing them with the right techniques and tools.
Prep and Cook Time
- Planning: 20 minutes
- Cooking/Baking: 25-35 minutes (depending on recipe)
Yield
- Makes approximately 12 standard servings
Difficulty Level
- Medium – requires attention to detail and precise measurements
Choosing the Perfect Gluten-Free Flours for Flavor and Texture
When mastering gluten-free baking,opting for a blend rather than a single flour is key. Almond flour lends a nutty richness and moisture, making crumbly treats soft and tender. Simultaneously occurring, tapioca flour works wonders adding chewiness and elasticity.For a neutral backdrop, white rice flour offers a mild taste and fine crumb, while buckwheat introduces an earthy depth perfect for heartier baked goods. Combining these crafts a symphony of flavor and texture that mimics traditional wheat-based recipes but without gluten’s structure.
Unlocking the secrets of Moisture and Binding Agents in Gluten-Free Recipes
Gluten-free flours naturally lack the binding elasticity gluten offers, making moisture retention and binding agents a baking challenge. Incorporating ingredients like psyllium husk, chia seeds soaked in water, or flaxseed meal can dramatically improve the dough’s cohesiveness and moisture levels. Additionally, adding apple cider vinegar or lemon juice activates baking soda more effectively, contributing to greater rise and softness. Use dairy or dairy-alternative yogurts and oils to retain moistness rather than relying solely on butter.
Techniques for Achieving Light and Fluffy Gluten-free Baked Goods
Achieving lightness in gluten-free baking hinges on meticulous mixing and leavening. Whipping egg whites separately before folding them into the batter creates air pockets that lift the crumb beautifully. Careful not to overmix your batter to avoid a dense and gummy result – gentle folding preserves all that precious aeration. Sifting your gluten-free flour blend ensures an even texture and avoids clumps that can weigh down your baked goods. let batter rest for 10-15 minutes before baking to hydrate the flours fully,producing a lighter finish.
essential Equipment and Tools to elevate Your Gluten-Free Baking Experience
Equipping your kitchen with the right tools can transform your gluten-free baking outcomes. A digital kitchen scale guarantees accuracy when measuring flours, which is critical for gluten-free blends. A high-quality stand mixer with a whisk attachment helps properly aerate batters.Investing in a set of silicone spatulas makes folding egg whites and mixing delicate batters easier without deflating them. Don’t underestimate the power of a sifter or fine-mesh sieve to aerate flour blends before mixing. use reliable springform pans or silicone molds to prevent sticking and encourage even baking.
Ingredients
- 1 cup almond flour
- 1/2 cup white rice flour, sifted
- 1/4 cup tapioca starch
- 2 tsp psyllium husk powder
- 1/2 tsp baking soda
- 1 tsp baking powder (gluten-free certified)
- 1/4 tsp salt
- 3 large eggs, separated
- 1/2 cup plain Greek yogurt or dairy-free alternative
- 1/3 cup coconut oil, melted
- 1/4 cup honey or pure maple syrup
- 1 tsp vanilla extract
- 1 tsp apple cider vinegar
Instructions
- Preheat your oven to 350°F (175°C). Grease and line a 9-inch round cake pan or muffin tin with parchment paper to ensure easy release.
- In a large bowl, combine almond flour, white rice flour, tapioca starch, psyllium husk powder, baking soda, baking powder, and salt.Whisk thoroughly to evenly distribute all dry ingredients.
- In a seperate bowl, whisk the egg yolks, Greek yogurt, coconut oil, honey, vanilla extract, and apple cider vinegar until smooth and well-combined.
- Carefully fold the wet mixture into the dry ingredients, stirring gently until the batter is fully combined. Avoid overmixing.
- Using a clean, dry bowl and whisk or electric mixer, beat the egg whites until stiff peaks form. Gradually fold the beaten egg whites into the batter in thirds, using a spatula. This aeration helps achieve a fluffy texture.
- Allow the batter to rest for 10 minutes to let the flours absorb moisture fully and the psyllium husk activate.
- Pour the batter evenly into your prepared pan or muffin tins and smooth the top with a spatula.
- Bake for 25-35 minutes, or until a toothpick inserted in the center comes out clean and the sides start to pull away from the pan.
- Remove from oven and let cool wholly on a wire rack before slicing or serving.
Tips for Success
- For extra moisture, substitute part of the Greek yogurt with dairy-free alternatives such as coconut yogurt.
- Experiment with adding citrus zest (like lemon or orange) to brighten flavors without overpowering.
- If your batter feels too thick, add a tablespoon of almond milk or water to loosen it slightly.
- To make ahead: Bake your cake or muffins, then freeze individually wrapped for up to 3 months. Thaw at room temperature.
- If your baked goods turn out gummy, reduce your liquid slightly and ensure your baking powder is fresh.
Serving Suggestions
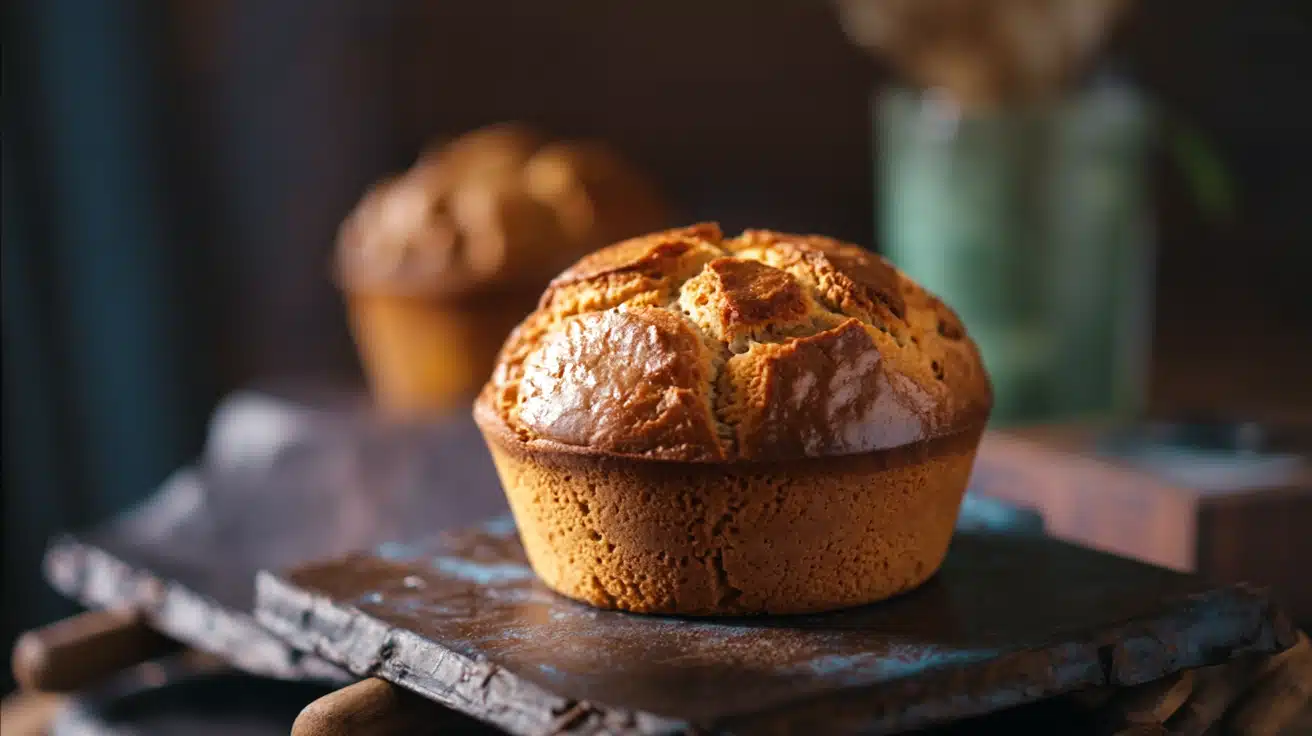
Serve your light and fluffy gluten-free cake or muffins with a dusting of powdered sugar or an elegant drizzle of homemade berry coulis. Fresh berries and a dollop of whipped coconut cream add a refreshing contrast. For a cozy brunch, pair with a spread of almond butter and local honey. Visually, accent your plated dessert with edible flowers or a sprig of fresh mint to elevate presentation – making every bite feel like a festivity of mastering gluten-free baking.


| nutrient | Amount per Serving |
|---|---|
| Calories | 180 kcal |
| Protein | 6 g |
| carbohydrates | 12 g |
| Fat | 12 g |
Discover more gluten-free baking secrets in our comprehensive gluten-free baking tips guide and deepen your knowledge through resources like The Celiac Disease Foundation.
Q&A
Mastering Gluten-Free Baking: tips for Delicious Results
Q&A
Q1: What is the biggest challenge when baking gluten-free?
A1: The biggest challenge is achieving the right texture and structure without gluten’s natural elasticity. Gluten acts like a glue in traditional baking,helping dough rise and hold together. Without it, gluten-free baked goods can be crumbly or dense if you don’t use the right mixes of flours, binders, and techniques.
Q2: Which gluten-free flours work best for baking?
A2: A combination works better than relying on a single flour. Popular options include rice flour, almond flour, sorghum flour, and tapioca starch.Blending these flours helps mimic the texture and moisture retention of wheat flour. Each flour brings a unique flavor and property, so experimenting with blends is key.
Q3: How do binders improve gluten-free baked goods?
A3: binders like xanthan gum, guar gum, or psyllium husk powder provide elasticity and structure that gluten would typically offer. Just a small amount helps hold ingredients together and improve texture, resulting in softer, less crumbly results.
Q4: Can I substitute gluten-free flour 1:1 for regular flour in my favorite recipes?
A4: Not quite. Gluten-free flours absorb moisture differently and behave distinctly in recipes. It’s usually better to follow tested gluten-free recipes or adjust liquids, fat, and binders when converting a traditional recipe to gluten-free.Q5: What role does moisture play in gluten-free baking?
A5: Moisture is critical because gluten-free flours often soak up liquids more aggressively. Adding ingredients like applesauce, yogurt, or extra eggs can help keep your baked goods tender, moist, and pleasantly chewy.
Q6: How important is the resting time for gluten-free doughs and batters?
A6: Resting time is a secret weapon! Letting batter sit for 20-30 minutes before baking allows flours and starches to hydrate fully,leading to better texture and less graininess in the final product.
Q7: Which baked goods are easiest for beginners to try gluten-free?
A7: Muffins, pancakes, and fast breads are great starting points. They require less precision in dough structure and often bake up moist and forgiving, making them ideal for experimenting with gluten-free flours.
Q8: Is it necessary to avoid cross-contamination?
A8: Absolutely! Even trace amounts of gluten can cause reactions in sensitive individuals and affect flavors. Clean surfaces, dedicated utensils, and properly labeled storage help keep your gluten-free baking truly safe and delicious.
Q9: Any tips for getting that perfect rise in gluten-free bread?
A9: Yes! Use a mix of gluten-free flours with good starch content, add binders, and give your yeast plenty of fuel with a bit of sugar or honey. Also, allow ample rising time in a warm environment. Some gluten-free doughs benefit from a second rise or “proofing” stage to improve volume.Q10: How can I add variety and flavor without gluten?
A10: feel free to experiment with nuts, seeds, fresh herbs, citrus zests, spices like cinnamon and cardamom, or even shredded vegetables like zucchini or carrots. These additions enhance nutrition and add exciting complexity to your gluten-free creations.
Mastering gluten-free baking is all about understanding your ingredients’ quirks and embracing a bit of culinary creativity. With patience and practice, your gluten-free treats will not just meet expectations-they’ll delight!
Final Thoughts
As you close the chapter on gluten-free baking, remember that mastering this art is as much about patience and experimentation as it is about ingredients and techniques. With each mix, fold, and bake, you’re not just creating delicious treats-you’re redefining what gluten-free truly means. Armed with these tips and a sprinkle of creativity, your kitchen can become a haven where flavor shines without compromise. So go ahead, embrace the journey, and let every loaf, cake, and cookie tell the story of your newfound mastery. Happy baking!