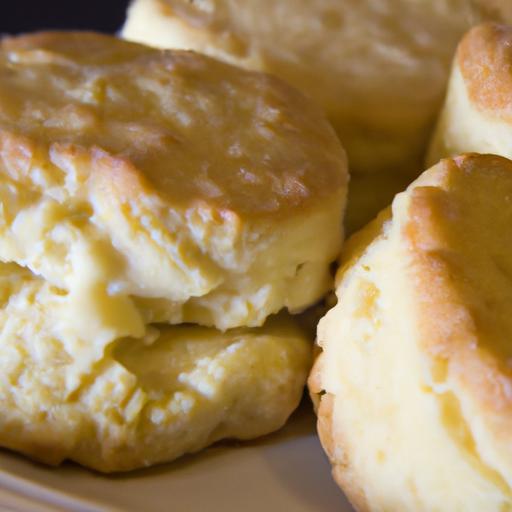
There’s something utterly comforting about the warm, flaky layers of a perfectly baked buttermilk biscuit-each bite a tender kiss of buttery goodness that melts in your mouth. Whether slathered with honey, paired with savory gravy, or enjoyed plain, fluffy buttermilk biscuits have long held a cherished spot at tables across the world. But mastering that golden, pillowy texture can seem elusive to many home bakers. Fear not! In this step-by-step recipe guide, we’ll unravel the secrets behind creating irresistibly light and tender buttermilk biscuits, breaking down every stage with clear instructions and helpful tips. Prepare to fill your kitchen with the aroma of baked warmth and bring a slice of Southern comfort right to your own countertop.
Fluffy buttermilk biscuits are a beloved Southern classic, treasured for their tender crumb and irresistibly light texture. Originating from customary american kitchens, these biscuits evoke warmth and nostalgia-perfect for breakfast, brunch, or a comforting snack. What truly sets them apart is the harmony between the tangy buttermilk and the delicate layers created by careful mixing and folding. As a culinary content creator, I’ve discovered that mastering these elements transforms simple ingredients into a masterpiece of fluffiness and flakiness that melts in your mouth.
Prep and Cook Time
- Preparation: 15 minutes
- Resting Time: 10 minutes
- Baking: 12-15 minutes
- Total Time: Approximately 40 minutes
Yield
Yields 8 generous biscuits
Difficulty Level
Easy to Medium - Perfect for all skill levels, especially beginners eager to hone their baking skills.
Ingredients
- 2 cups all-purpose flour, sifted for maximum lightness
- 1 tablespoon baking powder, fresh and active
- 1 teaspoon baking soda
- 1 teaspoon fine sea salt
- 6 tablespoons cold unsalted butter, cubed (key for flaky layers)
- 1¼ cups cold buttermilk, stirred gently
- 1 tablespoon honey or maple syrup (optional, for subtle sweetness)
Instructions
- Preheat your oven to 425°F (220°C) and line a baking sheet with parchment paper to ensure even baking.
- Combine dry ingredients: In a large bowl, whisk together the flour, baking powder, baking soda, and salt. Sifting here helps aerate the mixture, contributing to a lighter biscuit.
- Incorporate butter: Add the cold, cubed butter to the dry mix. Using a pastry cutter or your fingertips, quickly work the butter into the flour until the texture resembles coarse cornmeal with pea-sized lumps. These small chunks of butter create the signature flaky layers.
- Add buttermilk: Gently pour the chilled buttermilk and optional honey into the bowl all at once. Fold the mixture gently with a wooden spoon or spatula, mixing until just combined. The dough should be slightly sticky but not wet-overmixing activates gluten, resulting in dense biscuits.
- Turn out the dough: Lightly flour a clean surface. Using a spatula,transfer the dough onto the surface and gently pat it into a rectangle about ¾ inch thick. Avoid heavy kneading to keep the biscuits tender.
- Fold for layers: Fold the dough in thirds-like a letter-and gently pat it back to ¾ inch thick. Repeat this folding process 2-3 times to build distinct, flaky layers without overworking.
- cut the biscuits: Using a 2½-inch round cutter dipped in flour, press straight down into the dough. Avoid twisting the cutter, which can seal edges and prevent rise.Gather scraps, pat gently, and cut remaining biscuits.
- Bake: Place biscuits close but not touching on the baking sheet.For an extra golden crust,brush tops lightly with buttermilk. Bake for 12-15 minutes until puffed and deep golden brown.
- Cool briefly: Allow biscuits to rest 5 minutes before serving-the crumb will set perfectly, making every bite buttery and tender.
Chef’s Notes & Tips for Success
- Butter temperature: Ensure your butter is cold straight from the fridge. Warm butter fails to create flaky pockets.
- Buttermilk alternatives: If you don’t have buttermilk, mix 1¼ cups of milk with 1 tablespoon lemon juice or white vinegar; let sit 5 minutes.
- Mixing caution: Always err on the side of under-mixing. A few dry flour patches are better than overworked dough.
- Make-ahead option: Assemble biscuits, place on a baking sheet, freeze for 1 hour, then transfer to a freezer bag. bake frozen biscuits adding 5-7 minutes to baking time.
- storage: Keep leftovers in an airtight container up to 2 days; warm gently in the oven before serving.
Serving Suggestions
These fluffy buttermilk biscuits are a versatile canvas for sweet or savory accompaniments. Serve warm slathered with creamy butter and drizzled honey, or alongside a bowl of spicy Southern style chicken gravy for an indulgent brunch. For a fresh touch, garnish with chopped chives or fresh thyme. Layer with sharp cheddar and sliced ripe tomatoes for a crave-worthy biscuit sandwich. Don’t forget a pat of compound herb butter-imagine rosemary and garlic melting into those flaky layers.

| Nutrient | Per biscuit (approx.) |
|---|---|
| Calories | 190 |
| protein | 4g |
| Carbohydrates | 25g |
| Fat | 8g |
For more inspiring ways to use your baking skills, check out our Best Savory Dinner Biscuits guide. Additionally, the King Arthur Flour biscuit page offers expert insights into flour selections and baking techniques.
Q&A
Fluffy Buttermilk Biscuits: A Step-By-Step Recipe Guide – Q&A
Q1: What makes buttermilk biscuits so delightfully fluffy?
A1: The secret to fluffy buttermilk biscuits lies in a few magical ingredients and techniques. Buttermilk’s natural acidity reacts with baking powder or baking soda to create tiny bubbles, which help the dough rise. Additionally, cutting cold butter into the flour creates pockets of fat that melt during baking, producing layers and a tender crumb. gentle handling of the dough preserves these bubbles, ensuring a light, airy texture.


Q2: can I substitute regular milk if I don’t have buttermilk on hand?
A2: Absolutely! While buttermilk adds that distinct tang and tenderness, a swift homemade substitute is easy. Combine one cup of milk with one tablespoon of lemon juice or white vinegar, then let it sit for 5-10 minutes until it slightly curdles. This acidic mixture mimics buttermilk’s properties and will help you achieve those fluffy biscuits.
Q3: How critically important is the temperature of the butter?
A3: It’s crucial! Using cold butter-straight from the fridge-creates those buttery pockets that steam and puff up during baking. Warm or melted butter blends too thoroughly with the flour, resulting in a denser biscuit. For best results, chill your butter and even consider freezing it for a few minutes before grating or cutting it into the dough.
Q4: Should I use a food processor or mix by hand?
A4: Both methods work well, but mixing by hand allows for more control. When you cut butter into flour manually, you can feel when the mixture resembles coarse crumbs with pea-sized butter bits remaining. This texture is key to flaky layers. Though, a quick pulse in a food processor can speed things up-just be careful not to overwork the dough.
Q5: What’s the best way to cut and shape biscuits?
A5: Use a sharp biscuit cutter or a glass with a thin edge for clean cuts. Press straight down without twisting; twisting seals the edges and can inhibit rising. Gather scraps gently to re-roll once or twice, but avoid overworking the dough to keep biscuits tender.
Q6: How do I get that perfect golden-brown top?
A6: brushing the tops with melted butter or a little milk before baking helps achieve a golden crust with an irresistible sheen. For extra flavor and color, a light sprinkle of sugar or flaky salt can add a subtle crunch.
Q7: Can I prepare biscuit dough ahead of time?
A7: Yes! After mixing and shaping, you can refrigerate the dough for up to 24 hours. When ready to bake, bring the dough to room temperature and bake as usual. This resting time can actually improve flavor and texture.
Q8: What are some flavorful serving suggestions for fluffy buttermilk biscuits?
A8: These biscuits shine with sweet or savory toppings! Spread them with honey butter or fresh jam for a comforting treat, or pair them with scrambled eggs and fresh veggies for a hearty breakfast. They also serve as perfect companions to hearty soups, stews, or creamy gravies.
Q9: How do I store leftover biscuits to maintain freshness?
A9: Store biscuits in an airtight container at room temperature for up to two days. To revive them, warm briefly in the oven or toaster oven to restore their flaky texture. For longer storage, freeze cooled biscuits in a sealed bag for up to three months and reheat as needed.
Q10: What common mistakes should I avoid when making buttermilk biscuits?
A10: Overmixing the dough can toughen biscuits; mix just until ingredients come together.Using warm butter or buttermilk can reduce flakiness. Lastly,don’t open the oven door repeatedly while baking-keep the heat steady for optimal rise and browning.
With these tips and answers in your kitchen arsenal, your fluffy buttermilk biscuits are sure to be the star of any meal!
In Conclusion
And there you have it-a golden, fluffy batch of buttermilk biscuits, crafted with love and a simple step-by-step guide. Whether enjoyed warm with a pat of butter,slathered in honey,or served alongside your favorite savory dishes,these biscuits are sure to become a beloved staple in your kitchen. Remember,the key to biscuit perfection lies in cold ingredients,gentle hands,and just a touch of patience.So next time you crave that comforting, melt-in-your-mouth goodness, let this recipe be your trusted companion. Happy baking, and may your biscuits always rise to the occasion!