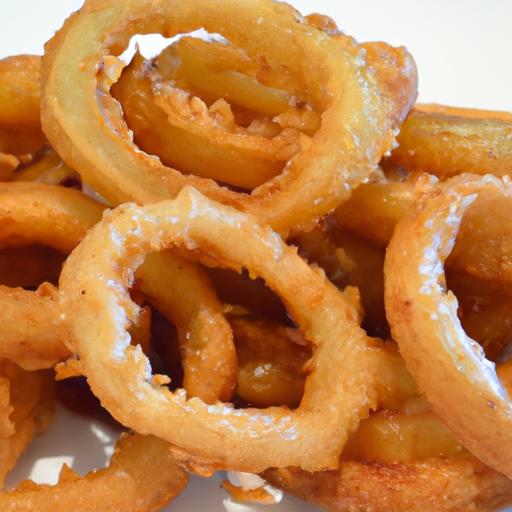
Ther’s something undeniably magical about the perfect onion ring: a golden, crunchy exterior giving way to tender, sweet onion within.Whether served as a tempting appetizer, a sidekick to your favorite burger, or simply a snack to satisfy those cravings, crispy onion rings hold a special place in the hearts (and stomachs) of food lovers everywhere. But achieving that signature crunch and flavor isn’t just luck-it’s a culinary art. In this guide, we’ll unravel the secrets to making irresistibly crispy onion rings at home, sharing tips, tricks, and a foolproof recipe that will have you dunking, munching, and craving more in no time. Get ready to elevate your snack game with every satisfying bite!
The secret to truly unforgettable crispiness in onion rings begins long before the batter hits the hot oil. Selecting the perfect onion is an art that sets the foundation for a snack bursting with flavor and texture. For this Crispy Onion Rings Recipe, a sweet and mild Vidalia or walla Walla onion is ideal. Their larger rings and natural sweetness enhance every bite, while their firm texture resists sogginess during soaking and frying. Avoid overly pungent or thin onions as these can compromise the balance between tender onion and crunchy coating.
Crafting the Ideal Batter for a Golden Crunch
Creating the ideal batter isn’t just about mixing flour and water – it’s a precise chemistry that determines the luxurious crunch you crave. Combining all-purpose flour with a touch of cornstarch lightens the coating, while a cold liquid base keeps the batter from absorbing too much oil. For this recipe, I always recommend using ice-cold sparkling water or beer (non-alcoholic if preferred) for an airy, light crust. Adding a hint of baking powder encourages lift, while a sprinkle of smoked paprika, garlic powder, and a pinch of salt enhances the flavor profile without overpowering the onion’s natural sweetness.
Mastering the Frying Technique for Irresistible Texture
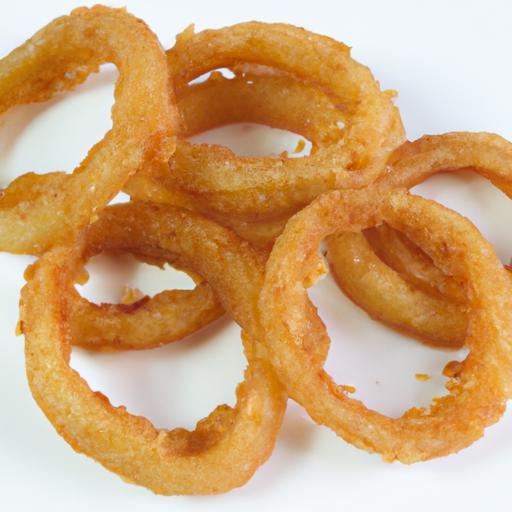
The magic happens in the hot oil. Temperature control is essential – too cold, and the onion rings soak up oil and become greasy; too hot, and the exterior burns before the onion softens.Aim for 350°F (175°C), using a deep fryer or a heavy-bottomed pan with a thermometer. Fry in small batches, gently lowering each battered ring into the oil and turning once to ensure even browning. The result is a golden, bubbly crust encasing a tender, sweet onion center that delivers an irresistible crunch with every bite. Drain on paper towels to maintain perfect texture.
Serving Suggestions and Flavor Enhancements
Presentation matters, and serving these onion rings hot and fresh maximizes their appeal. Pile them on a rustic wooden board or in a lined basket for casual gatherings. Garnish with fresh chopped parsley or chives for a pop of color and freshness. Pair with classic dipping sauces like creamy garlic aioli, zesty chipotle mayo, or a tangy buttermilk ranch to elevate flavor complexity. For a modern twist, serve alongside a tangy mango chutney or a balsamic reduction drizzle to balance richness with brightness.

Prep and Cook Time
- Prep Time: 20 minutes
- Cook Time: 15 minutes
- Total Time: 35 minutes
Yield
Serves 4 as a snack or appetizer
Difficulty Level
Easy to Medium – perfect for beginners ready to impress


Ingredients
- 2 large sweet onions (vidalia or Walla Walla), peeled and sliced
- 1 cup all-purpose flour, sifted
- ½ cup cornstarch
- 1 teaspoon baking powder
- 1 teaspoon smoked paprika
- ½ teaspoon garlic powder
- 1 teaspoon kosher salt
- 1 cup ice-cold sparkling water (or non-alcoholic beer)
- Vegetable oil, for frying
Instructions
- Prepare the onions: Separate the onion slices into individual rings about ½ inch thick. Set aside.
- Make the batter: In a large bowl, whisk together the flour, cornstarch, baking powder, smoked paprika, garlic powder, and salt until well combined.
- Add sparkling water: Slowly pour the ice-cold sparkling water into the dry ingredients, stirring gently until a smooth, slightly thick batter forms. keep it cold by placing the bowl over a larger bowl filled with ice if needed.
- Heat the oil: Pour vegetable oil into a deep fryer or heavy pot to a depth of about 3 inches. Heat to 350°F (175°C). Use a thermometer to maintain consistent temperature.
- Dredge and fry: Dip onion rings into the batter, allowing excess to drip off. Carefully lower them into the hot oil in small batches to avoid overcrowding. Fry each batch for 2-3 minutes, turning once until golden and crisp.
- Drain and rest: Remove the rings with a slotted spoon and place on paper towels to drain excess oil. Serve immediately for best texture.
Tips for Success
- Keep batter cold: This prevents premature gluten growth and results in a light,crispy crust.
- Don’t overcrowd: Fry in small batches to maintain oil temperature and crispiness.
- Oil temperature is key: Use a deep-fry thermometer for precision. Adjust heat as needed to keep 350°F steady.
- Make-ahead option: Prepare batter and onion rings, then refrigerate coated rings for up to 30 minutes before frying.
- Substitutions: Swap cornstarch for rice flour to create a gluten-free crunch.
Serving Suggestions and Flavor Enhancements
Serve your crispy onion rings with a sprinkle of flaky sea salt and chopped fresh herbs like parsley or cilantro. For dipping, try a combination of creamy garlic aioli or a spicy Sriracha mayo. These vibrant sauces complement the golden crust and sweet,tender onion perfectly. For a Southern-inspired twist, add a side of tangy buttermilk ranch dressing and fresh lemon wedges to brighten every bite.
| Nutritional Info (per serving) | Amount |
|---|---|
| Calories | 320 kcal |
| protein | 4 g |
| Carbohydrates | 45 g |
| Fat | 12 g |
For more snack inspiration and expert tips, check out our guide on crispy fried snacks. To deepen your understanding of oil frying techniques, visit Serious Eats’ frying guide.
Q&A
Q&A: Crispy Onion Rings Recipe – Your Ultimate Snack Guide
Q1: What makes onion rings crispy instead of soggy?
A1: The secret to crispy onion rings lies in the batter and frying technique. Using a cold, well-seasoned batter with ingredients like flour, cornstarch, and sometimes beer or sparkling water creates a light, airy crust. Double-dipping the rings and frying at the right temperature (around 350°F/175°C) ensures a golden, crunchy exterior without absorbing excess oil.
Q2: Can I use any type of onion for onion rings?
A2: While many prefer sweet onions such as Vidalia or Walla Walla for their natural mildness and slight sweetness, yellow onions and white onions also work well. The key is to slice them evenly – about ¼ inch thick – so they cook uniformly and maintain a satisfying bite.Q3: What are some creative batter variations for onion rings?
A3: Beyond the classic flour-and-egg batter, you can experiment with panko breadcrumbs for extra crunch, cornmeal for a slightly coarse texture, or tempura batter for a light, crisp finish. Adding spices like smoked paprika, garlic powder, or cayenne can add a flavor kick.
Q4: How do I prevent onion rings from sticking together during frying?
A4: make sure to pat the onion rings dry before battering to reduce moisture. Fry them in small batches to allow enough space in the oil, and use a slotted spoon or spider to gently separate them if they start to cling. Resting the battered rings briefly before frying also helps set the coating.Q5: Is it possible to bake onion rings instead of frying?
A5: Absolutely! For a healthier twist, coat the rings in batter or breadcrumbs, place them on a greased baking sheet, and spray or lightly brush with oil. Bake at 425°F (220°C) for about 20-25 minutes,flipping halfway,until golden and crispy. while frying delivers that classic crunch, baking is a delicious option with less oil.Q6: What dipping sauces pair best with crispy onion rings?
A6: Onion rings love flavorful dips! Classic choices include tangy ketchup, creamy ranch, spicy sriracha mayo, or a smoky chipotle aioli. You can also try a zesty honey mustard or a cool garlic yogurt dip for contrast.The key is a sauce that balances richness with a hint of acidity or spice.
Q7: Can I prepare the batter in advance?
A7: you can mix the dry ingredients ahead, but it’s best to prepare the wet batter just before frying to keep it fresh and bubbly.If your recipe includes carbonated liquids or beaten egg whites,those elements lose their potency quickly,affecting texture.
Q8: How do I store leftover onion rings?
A8: To keep leftover onion rings crispy, place them on a wire rack in a single layer and store in a loosely covered container in the fridge. reheat in the oven or air fryer at medium-high heat until warm and crisp again. Avoid microwaving, as it tends to make them soggy.
Q9: Are there any tips for making the onion rings less oily?
A9: Yes! Ensure your oil is hot enough before frying, so the rings crisp quickly and absorb less fat. Using a thermometer helps maintain the ideal frying temperature.Also, drain the rings on paper towels or a wire rack immediately after frying to remove excess oil.
Q10: Can I make onion rings gluten-free?
A10: Definitely! Substitute regular flour with gluten-free flour blends or rice flour, and use cornstarch or potato starch in your batter.Just be mindful to check all other ingredients (like baking powder) are gluten-free.The texture might differ slightly, but the crunch can still be deliciously satisfying.
Ready to create your own golden, crunchy masterpiece? With these tips, your crispy onion rings will be the star snack of any gathering – irresistible, flavorful, and perfectly crunchy every time!
In Retrospect
Whether you’re craving a crunchy snack to accompany your burger night or simply want to treat yourself to something delightfully crispy, mastering the art of the perfect onion ring is easier than you think. With this guide in hand, you’re well equipped to create golden, irresistible onion rings that deliver that satisfying crunch with every bite. So next time you hear the sizzle,remember-you’re not just making onion rings,you’re crafting a crispy masterpiece destined to be the star of any snack table. Happy frying!