Ther’s somthing undeniably magical about the chewy, sweet little spheres that dance at the bottom of a glass of bubble tea.These delightful boba pearls, also known as tapioca pearls, have captured the hearts-and taste buds-of tea lovers around the world. While many enjoy them from their favorite café, making boba pearls at home offers an enchanting hands-on experience that transforms a simple drink into a personal creation. In this step-by-step guide, we’ll unravel the art and science behind crafting homemade boba pearls, empowering you to bring that beloved chewy texture to your kitchen with ease and flair. Prepare to embark on a culinary adventure where patience meets creativity,and every pearl tells a story.
Choosing the Perfect Tapioca Starch for chewy Boba Pearls
Crafting homemade boba pearls starts with selecting the right tapioca starch-the foundation of that beloved chewy texture. tapioca starch, derived from cassava root, varies in granularity and moisture content, which drastically impacts the resilience and bounce of your boba.
For the ideal pearls, opt for pure, fine tapioca starch without additives or pre-mixed flours. Brands specializing in Asian cooking ingredients often provide the best consistency, with a bright white appearance and silky texture. The finest tapioca starch absorbs water more uniformly,allowing you to create a dough that’s pliable yet firm enough to hold its shape during cooking.
tip: Avoid tapioca flour labeled for thickening alone-it may lack the elasticity required for perfect chewiness. When armed with quality starch, you’ve just unlocked the frist secret to crafting homemade boba pearls that cook evenly and give that signature springy bite.
Mastering the Dough Consistency for Optimal Texture
Next, mastering the dough consistency is crucial; it’s where science meets art in crafting homemade boba pearls. Begin by gently boiling water and then gradually incorporating it into the tapioca starch. This hot-water method softly gelatinizes the starch, allowing it to bind smoothly.
As you mix,aim for a dough that’s slightly tacky but not sticky. The dough should hold together when pressed, yet break apart cleanly without excessive residue on your fingers. If the dough feels too dry, add water dropwise; if too sticky, sprinkle in more starch.
Working quickly but patiently is key. Knead the dough on a cold surface until it reaches a satiny finish and elasticity that springs back when pinched.This balance ensures your boba pearls will be chewy without turning gummy or crumbly after boiling.
Techniques for Shaping and Cooking Boba Pearls to Perfection
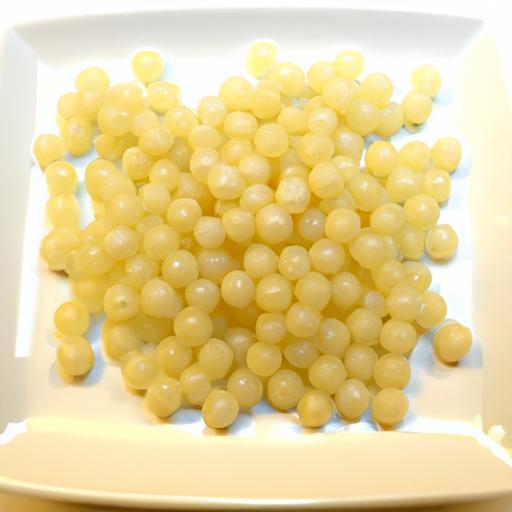
Forming perfectly round pearls is where crafting homemade boba pearls becomes a tactile joy. Pinch small pieces of dough-about 1 cm in diameter-and gently roll between your palms, applying just enough pressure to smooth edges without flattening.


For uniform cooking, keep pearl sizes consistent.Dust them lightly with tapioca starch to prevent sticking as you work.
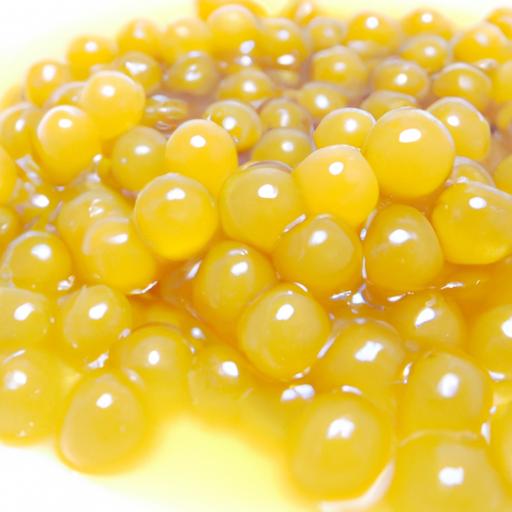
Bring a pot of water to a vigorous boil before adding the pearls.Stir gently to keep them suspended and prevent clumping. Cook for 20-25 minutes until they float and reach a tender, chewy texture. After boiling, transfer pearls into a bowl of cold water to halt cooking and firm up their structure.
Finishing pearls in a warm sugar syrup enhances gloss and flavor, inviting a delicate sweetness that complements milk teas beautifully.
Flavor Infusions and Storage Tips for Homemade Boba Pearls
Beyond the classic black boba, infusing your pearls with flavor adds an exciting twist. Mix cocoa powder or matcha powder into your dough for subtle earthiness, or incorporate brown sugar syrup post-cooking to create richer, caramelized notes.
For storage, keep cooked pearls submerged in fresh syrup at room temperature for up to 4 hours or refrigerate up to 24 hours in an airtight container. reheat gently in hot water before serving to restore chewiness. Avoid freezing, as ice crystals ruin the desirable bouncy texture.
With these techniques, you’ll achieve homemade boba pearls bursting with flavor and perfect chew-your milk tea creations will never be the same.
Prep and Cook Time
- Prep Time: 30 minutes
- Cook Time: 30 minutes
- Total Time: 1 hour
Yield
- Approximately 4 servings (60-70 boba pearls)
Difficulty Level
- Medium – requires kneading and shaping skills
Ingredients
- 1 cup tapioca starch (preferably fine, pure)
- 3/4 cup boiling water
- 2-3 tbsp brown sugar (for syrup)
- Additional tapioca starch for dusting
- Optional flavor additions: 1 tbsp cocoa powder or matcha powder
Instructions
- In a heatproof bowl, combine the tapioca starch (and optional flavor powders if using).
- Slowly pour the boiling water into the starch while stirring quickly with a spoon until it forms a hot, sticky paste.
- Allow to cool for 3-5 minutes, then knead with hands on a clean, cool surface until the dough becomes smooth, pliable, and elastic. Add more starch if excessively sticky.
- Pinch off small dough portions and roll into 1 cm diameter pearls.Lightly dust with starch to prevent sticking.
- Bring a large pot of water to a rapid boil. Add pearls gently, stirring occasionally.
- Cook for 20-25 minutes until pearls float and achieve a chewy texture. Then, remove pearls with a slotted spoon and immediately submerge into cold water for 5 minutes.
- Prepare brown sugar syrup by dissolving sugar in ½ cup hot water. Drain pearls and soak in syrup for at least 10 minutes to enhance flavor and shine.
- Serve pearls with your favorite milk tea or dessert.
Chef’s Notes
- For firmer pearls, extend boiling by 3-5 minutes but avoid overcooking to prevent gummy texture.
- Experiment with natural flavor powders like matcha or activated charcoal for color without additives.
- Store leftover syrup in the fridge up to 5 days; reheat before serving.
- Make ahead: Prepare dry dough balls and freeze; boil directly from frozen, adding a minute to cooking time.
- If dough cracks during shaping, add a few drops of water and knead to rehydrate.
Serving suggestions
- Add freshly cooked boba to classic milk tea with tapioca pearls and crushed ice for a refreshing drink.
- Top desserts like shaved ice or puddings for a chewy, textural contrast.
- Garnish with a sprinkle of toasted coconut flakes or a drizzle of honey for layered flavor.
| Nutrient | Per Serving |
|---|---|
| Calories | 110 kcal |
| Protein | 0.1 g |
| Carbohydrates | 27 g |
| Fat | 0 g |

Ready for more inspired tea creations? Check out our Ultimate Milk Tea Recipes to master signature beverages at home. For an authoritative deep dive into tapioca starch properties, visit the Encyclopedia Britannica entry on Tapioca.
Q&A
Q&A: Crafting Homemade Boba Pearls – A Step-by-Step Guide
Q1: What exactly are boba pearls, and why make them at home?
A1: boba pearls are those chewy, delightful spheres you find at the bottom of bubble tea. Traditionally made from tapioca starch, they offer a fun texture contrast to sweet, milky drinks. Making them at home lets you customize flavor, size, and freshness-plus, it’s a satisfying culinary adventure that elevates your tea game.
Q2: What ingredients do I need to craft homemade boba pearls?
A2: The essentials are simple: tapioca starch (or tapioca flour), boiling water, and brown sugar or regular sugar for sweetening. Optional extras include matcha powder, cocoa, or fruit purees to infuse your pearls with unique flavors and colors.
Q3: How do I achieve the perfect chewy texture?
A3: The magic lies in the ratio of tapioca starch to water and the cooking time. Begin by mixing hot water with tapioca starch until a pliable dough forms. Roll the dough into tiny spheres, boil them until they float, then simmer for 15-20 minutes. soak the pearls in a sugar syrup to keep them moist and tender.
Q4: Are there any tricks to rolling the pearls evenly?
A4: Yes! Keep your hands slightly damp to prevent sticking and roll smaller portions of dough at a time. Using a flat surface, pinch off tiny bits and gently roll them into spheres roughly the size of peas. Consistency in size ensures even cooking and a uniform bite.
Q5: How long do homemade boba pearls last?
A5: Freshly made pearls are best enjoyed within 4-6 hours for optimum chewiness.Stored in sugar syrup in the fridge, they may last up to 24 hours but tend to harden and lose their signature texture thereafter. Fresh is truly best!
Q6: Can I make vegan or gluten-free boba pearls?
A6: Absolutely! Tapioca starch is naturally gluten-free and vegan-amiable.Just double-check that your sweeteners and flavorings align with your dietary needs.Homemade boba is an inclusive treat for all tea lovers.
Q7: Any creative twists to elevate my homemade boba experience?
A7: Experiment with infusing tapioca dough with matcha for earthy green pearls or beetroot powder for vibrant pink ones. Try soaking cooked pearls in flavored syrups like honey-lavender or cinnamon-vanilla. The possibilities are as endless as your taste buds!
Crafting homemade boba pearls is more than a recipe-it’s a playful ritual that transforms simple ingredients into little bursts of joy. Ready your pots, roll up your sleeves, and brew a cup of creativity!
Future Outlook
Embarking on the journey of crafting homemade boba pearls transforms a simple beverage into an artisanal experience, blending patience, creativity, and a touch of culinary magic. With this step-by-step guide in hand, you’re now equipped to create chewy, glossy pearls that add that perfect burst of delight to your favorite drinks. Beyond just ingredients and techniques, making your own boba invites you to savor the process and customize each batch to your taste-whether that means experimenting with flavors, sizes, or textures.so next time you crave that iconic bubble tea charm, remember: the freshest, most satisfying pearls are the ones you craft yourself, turning every sip into a party of homemade bliss. Cheers to bubbling creativity!